This post covers how to setup an Oracle Grid Installation using Oracle 12c Release 1 (12.1 or 12102)
I am using an Oracle Linux 7 VM for this installation. I will install Grid Infrastructure for a stand alone database install.
Oracle documentation will provide more details on how to have a successful install.


I am using an Oracle Linux 7 VM for this installation. I will install Grid Infrastructure for a stand alone database install.
Oracle documentation will provide more details on how to have a successful install.
Preinstall Steps
Create all the required users and groups and set the required permissions on directory paths.
Create group for oraInventory and the grid user.
groupadd oinstall
useradd -g oinstall grid
Oracle will be installed in /u01. So create the directories required by the install and set the correct permissions.
mkdir -p /u01/app/12.1.0/grid
mkdir -p /u01/app/grid
chown -R grid:oinstall /u01
chmod -R 775 /u01/
Preinstallation Checks:
To determine the physical RAM size, enter the following command:
grep MemTotal /proc/meminfo
If the size of the physical RAM installed in the system is less than the required size, then you must install more memory before continuing.
To determine the size of the configured swap space, enter the following command:
grep SwapTotal /proc/meminfo
If necessary, see your operating system documentation for information about how to configure additional swap space.
To determine the amount of space available in the /tmp directory, enter the following command:
df -h /tmp
To determine the amount of free RAM and disk swap space on the system, enter the following command:
free -g
To determine if the system architecture can run the software, enter the following command:
uname -m
Verify that the processor architecture matches the Oracle software release to install. For example, you should see the following for a x86-64 bit system:
x86_64
If you do not see the expected output, then you cannot install the software on this system.
Verify that shared memory (/dev/shm) is mounted properly with sufficient size using the following command:
df -h /dev/shm
Now we are ready to begin the install.
From root user in an xterminal do:
xhost +
this will disable access control for the xserver.
su to the grid user and set the DISPLAY
su - grid
export DISPLAY=:0.0
cd to software directory and run the installer
./runInstaller
Select the option to install a Standalone Server.
Select the language to Install.
Name your disk group and specify the redundancy level.
In this case i am selecting External redundancy with an Allocation Unit size of 4 MB.
Specify Passwords for the various users. I selected the option to have the same passwords for both the users.
Register the installation with the Oracle cloud control (optional).
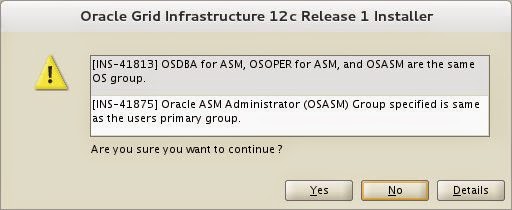
Select the OS Groups that were created earlier for the Oracle Install. I do not want to separate the maintenance duties, so I selected the same group for the whole install.
The system warns that the same group was selected. Click "Yes" to continue.
Input values for the desired Oracle Base and Install Location.
Input location for the Inventory Directory.
Select either of the options displayed to run the root scripts automatically. Else, uncheck the check box to run scripts manually when prompted.
Oracle will perform the prerequisite checks.
We see that there were a bunch of pre-requisite failures and warnings. Some are fixable automatically and some are not.
So first we let Oracle fix the failures that are fixable automatically by selecting "Fix and Check Again".
Oracle automatically displays a list of all the ones that were fixed automatically on the next Tab.
Click back to the first Tab. We see that there are still 3 Warnings.
In a separate root window, I installed the 2 missing OS packages with the following commands.
yum install ksh -y
yum install libaio-devel -y
Once the packages are installed successfully, Click the "Check Again" button.
After the check is complete the only violation is that the physical RAM on the box is slightly less than 4 gb. That can be fixed when the VM is next restarted, so for now, we can select the option to ignore that last warning and continue with the install.
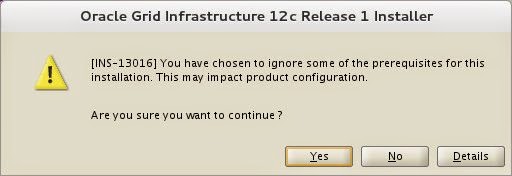
In order to do this, click the "Ignore All" checkbox and then click "Next".
Oracle warns that some prerequisites have been ignored. We click "Yes" to acknowledge.
The next screen shows the summary of all our install options. We need to verify that all selections are correct and change any if required.
Then we click the "Install" button to start the actual install.
When the install gets to the section "Execute Root Scripts" it warns us that it is going to run the scripts automatically (like we selected on the earlier screen). We have one more chance to run the scripts manually if desired.
In this case we click "Yes" to proceed with the automatic scripts. So the installation continues.
It successfully runs the root scripts and proceeds into the configuration section.
And at-last we have a successful installation screen. Click "Close" to exit the installer.
Post Installation Steps
Now we check crsctl to see if all components are good and stable.
crsctl status res -t
--------------------------------------------------------------------------------
Name Target State Server State details
--------------------------------------------------------------------------------
Local Resources
--------------------------------------------------------------------------------
ora.DGDATA.dg
ONLINE ONLINE localhost STABLE
ora.LISTENER.lsnr
ONLINE ONLINE localhost STABLE
ora.asm
ONLINE ONLINE localhost Started,STABLE
ora.ons
OFFLINE OFFLINE localhost STABLE
--------------------------------------------------------------------------------
Cluster Resources
--------------------------------------------------------------------------------
ora.cssd
1 ONLINE ONLINE localhost STABLE
ora.diskmon
1 OFFLINE OFFLINE STABLE
ora.evmd
1 ONLINE ONLINE localhost STABLE
--------------------------------------------------------------------------------
Check sqlplus to see that the DGs look good.
sqlplus / as sysasm
SQL*Plus: Release 12.1.0.2.0 Production on Thu Mar 5 11:35:47 2015
Copyright (c) 1982, 2014, Oracle. All rights reserved.
Connected to:
Oracle Database 12c Enterprise Edition Release 12.1.0.2.0 - 64bit Production
With the Automatic Storage Management option
SQL> column name format a15
col USABLE_FILE_MB format 9999999
set pages 500 lines 132
select NAME, TYPE, GROUP_NUMBER, TOTAL_MB, FREE_MB, REQUIRED_MIRROR_FREE_MB mirror_mb, USABLE_FILE_MB from V$ASM_DISKGROUP;
set linesize 132
column name format a15
column path format a35
select GROUP_NUMBER grp_no, DISK_NUMBER dsk_no, STATE, HEADER_STATUS, TOTAL_MB, FREE_MB, NAME, PATH from v$asm_disk;
SQL> SQL> SQL>
NAME TYPE GROUP_NUMBER TOTAL_MB FREE_MB MIRROR_MB USABLE_FILE_MB
--------------- ------ ------------ ---------- ---------- ---------- --------------
DGDATA EXTERN 1 12288 12192 0 12192
SQL> SQL> SQL> SQL> SQL>
GRP_NO DSK_NO STATE HEADER_STATU TOTAL_MB FREE_MB NAME PATH
---------- ---------- -------- ------------ ---------- ---------- --------------- -----------------------------------
1 0 NORMAL MEMBER 12288 12192 DGDATA_0000 /dev/sdb
Reboot the server and verify that all components come up without any issues.
So now we have successfully installed and configured Oracle 12c Release 1 Grid Infrastructure.